Glitching: Difference between revisions
No edit summary |
|||
| Line 138: | Line 138: | ||
[[File:Vita-vdd12-cap.jpg|thumb|Glitch VDD12 (left: VDD12, right: GND)]] | [[File:Vita-vdd12-cap.jpg|thumb|Glitch VDD12 (left: VDD12, right: GND)]] | ||
[[File:Vita-37M-clk.png|thumb|37M | [[File:Vita-37M-clk.png|thumb|37M CLK_OUT (remove the IC)]] | ||
=== Hardware === | === Hardware === | ||
Revision as of 16:57, 9 July 2018
eMMC
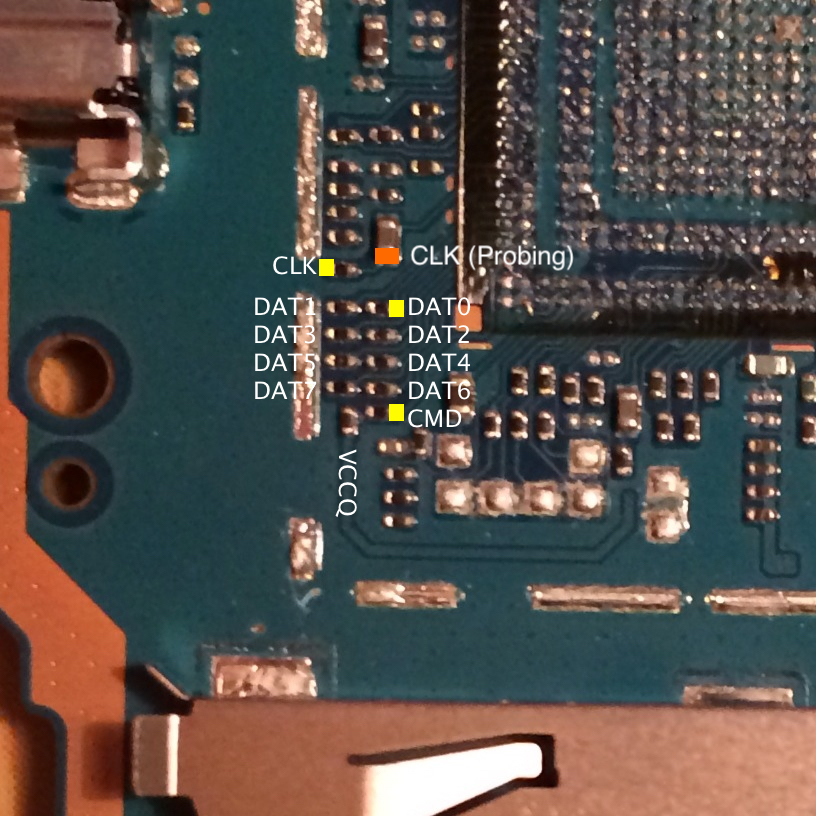
CMD, CLK, and DAT0 are needed to flash the eMMC. Note that the Vita uses 1.8V logic and most if not all SD card adapters use 3.3V logic so unlike other devices you cannot just solder to a standard SD card adapter! psvemmc v1.2+ contain level translation that allow you to safely interface with the Vita eMMC.
Connection
Use 28AWG wire to solder directly to the termination resistor. There are no testpoints. For the clock signal, there are two different spots. Solder to the yellow if you wish to drive the eMMC clock (flashing with psvemmc for example). Solder to the orange if you only wish to probe the eMMC. The reason for this discrepancy is because the CLK is push-pull drive and at 1.8V it is harder for the adapter to "fight" Kermit in controlling the clock signal if you solder too close to it. If you are too far though, you won't get a good signal for sniffing at 50MHz. Currently, the solution is to use two different pads.
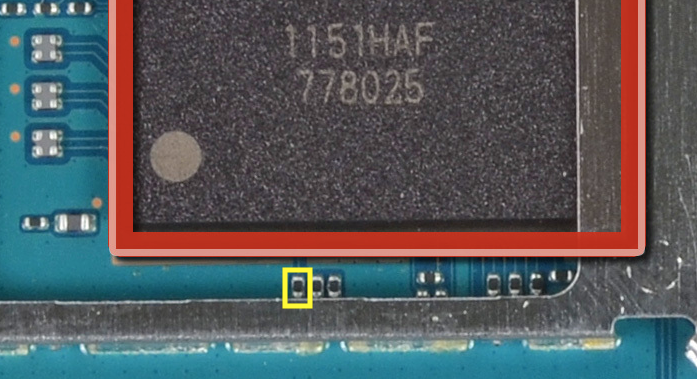
You need the Vita to power the eMMC so it has to be turned on before you can attach an external adapter. However, the Vita will not stop trying to drive the eMMC clock until after boot is done. This means you should not try to connect an external adapter until after the Vita is idling in shell or safe mode. If you are not able to boot into either modes, an alternative is to hold Kermit in reset. The pulldown resistor for RESET_N is boxed in yellow.
ChipWhisperer
psvemmc Target
psvemmc v2.0+ has an interface for connecting the chipwhisperer lite through a 20-pin connector.
| Number | Name | Dir | Description |
|---|---|---|---|
| 1 | N/C | O | Not Connected |
| 2 | GND | O | System GND. |
| 3 | N/C | O | Not Connected |
| 4 | CLK_IN | I/O | EXT_CLK input to CW (can be left unconnected) |
| 5 | RESET_N | I/O | Kermit RESET |
| 6 | CLK_OUT | I/O | Clock from CW to Vita |
| 7 | SPI_MISO | I/O | SPI input: MISO |
| 8 | VTarget | I | Driven to +1.8V. |
| 9 | SPI_MOSI | I/O | SPI output: MOSI |
| 10 | UART_TX | I/O | TargetIO Pin 1 - UART TX |
| 11 | SPI_SCK | I/O | SPI output: SCK |
| 12 | UART_RX | I/O | TargetIO Pin 2 - UART RX |
| 13 | SPI_CS | I/O | SPI input: CS |
| 14 | MMC_CLK | I/O | TargetIO Pin 3 - eMMC CLK (probing) |
| 15 | PWR_SW | I/O | Vita power switch |
| 16 | MMC_CMD | I/O | TargetIO Pin 4 - eMMC CMD (probing) |
| 17 | GND | O | |
| 18 | N/C | O | Not Connected |
| 19 | GND | O | |
| 20 | N/C | O | Not Connected |
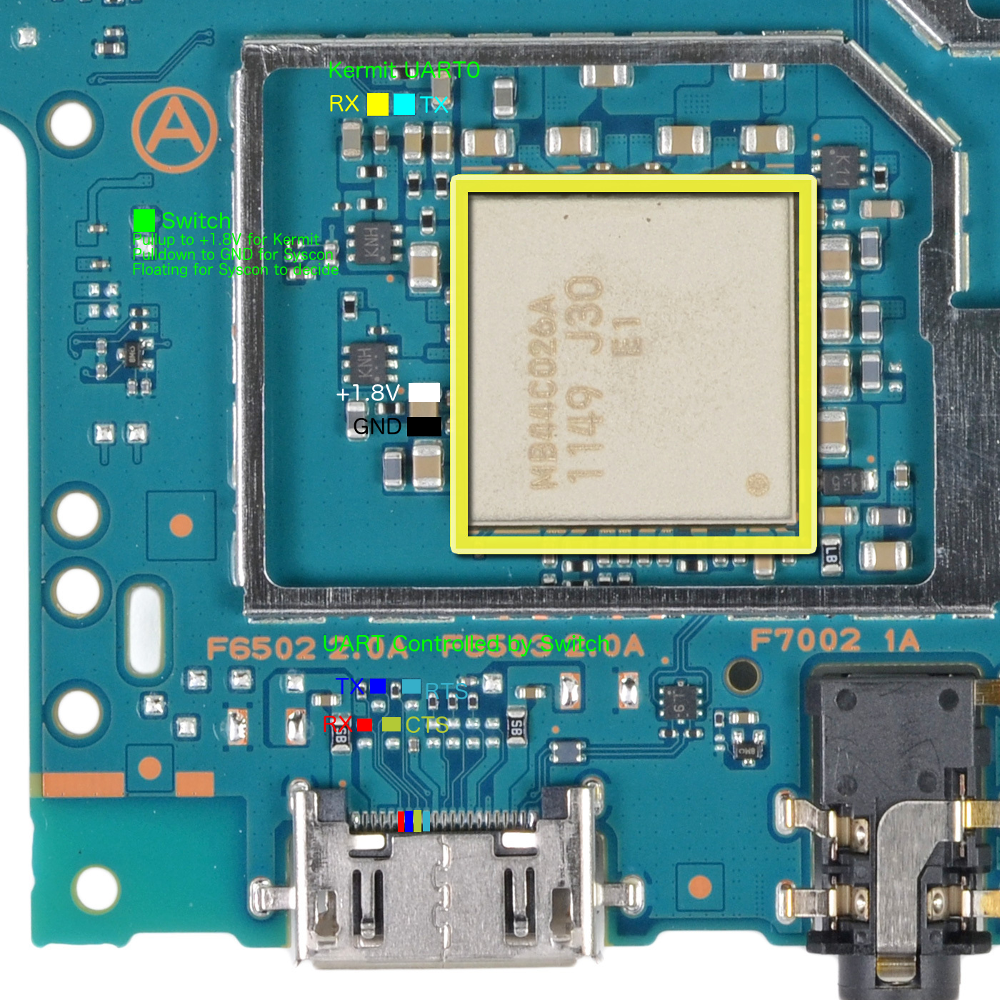
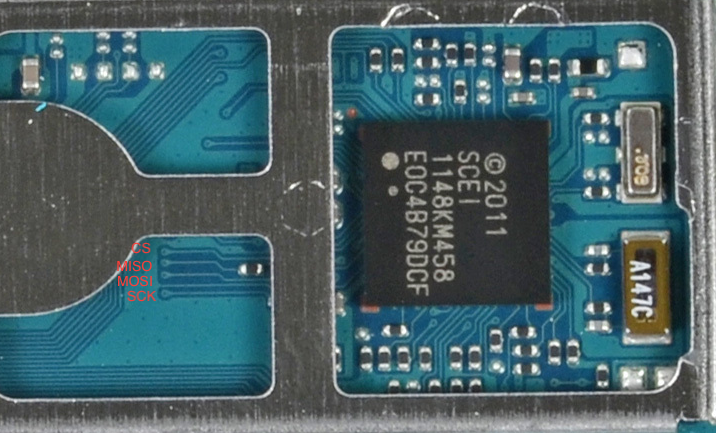
The eMMC and RESET_N pins are diagramed above. Others are listed below.
Hardware
The cwlite must be modified to support the +1.8V level required by the Vita target. First remove the solder bridge on SJ6, which forces the FPGA logic to 3.3V. Next solder some pin header to JP5 and place a jumper between pin 2 and 3 (the two pins farthest from the FPGA). This will allow the psvemmc target's 1.8V VTarget pin to be used.
Software
You must use the custom build of chipwhisperer. This build has the target IO restraints set to 1.8V as well as support for the MMC logger/trigger and UART trigger. Follow the installation instructions from [newae https://wiki.newae.com/Installing_ChipWhisperer] and you can execute the glitch scripts by copying them to "software/vita-glitching".


